Multi-screen form that clears itself - please note why solutions haven't worked

Tried 5 solutions, see clear explanation and documentation

Hi there, i need to create a multi-screen form that

  • Shows one submit button and only when all required fields are filled, must consider hidden required fields
  • Has multi-screen visibility logic
  • Wipes itself after submission

I have read a lot of documentation and community posts. Here’s what I have tried and why it hasn’t worked, feel free to skip to solution E, the current contender:

A) Custom Form using unspecified container, visibility logic and “add row” action
Does not wipe old fields after submission, they persist when user returns to submit a new instance. Yes, this is clearly documented, see next attempted.

B) Custom Form using unspecified container, visibility logic and “add row” action followed by “set values to [clear value]” in a workflow


This is the workflow I built for this. Below is the original state of my data:

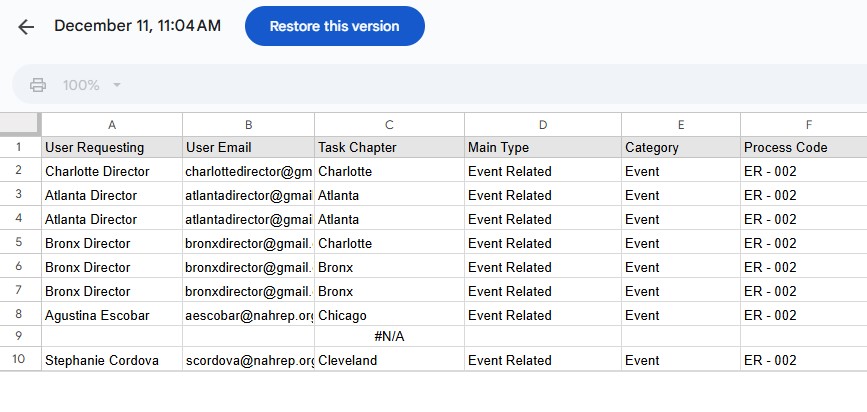
and following is my data after using this workflow:

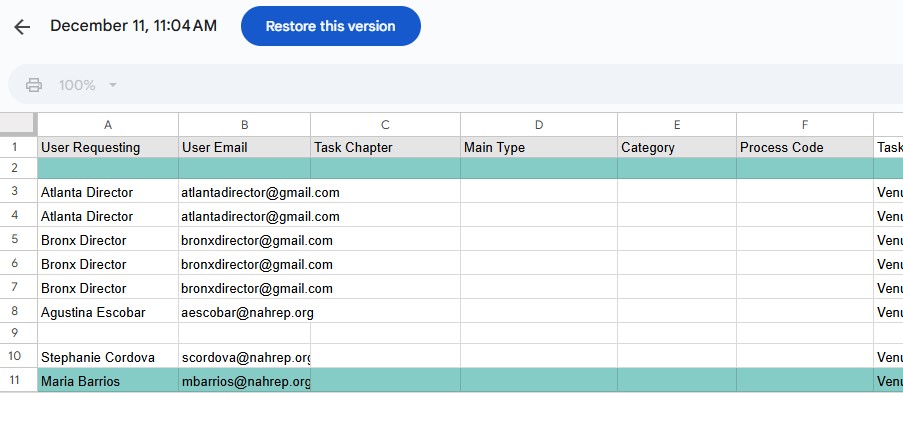
Note that it preserves the data in the “this” row from the “Add Row” action, but somehow then the “this” row in the next action starts referring to the first row of the sheet rather than even the last row. I’m glad that it didn’t clear the just-submitted data, but this is not…better.

C) Custom Form using unspecified container, visibility logic and “add row” action followed by “set values to [clear value]” in an action row
Has two buttons, I only want one button. But it did clear the values!

D) Custom Form using unspecified container, visibility logic and “add row” action followed by “add row” action followed by “set values to [clear value]” in a workflow
I was hoping this would somehow adjust the “this” to referring to a new, non-submitted form instance? Not that this makes sense, but the behavior in solution B didn’t make sense to me either. It did not work, it did go a row down and write over the first cell of the second row with only the single required field in the form.

E) Form container using visibility logic
This has multiple screens, a single submission button, and wipes itself after submission. However, i experienced this bug where it dislikes having empty non-required fields at the end of the form. When I got rid of those fields to try to demonstrate proof of concept, it got rid of the bug BUT I then experience what can only be a “feature” given the multiple complaints over the last 5 years where the Submit button is allowed while hidden required fields are empty. Because it is a form container, I can’t hide this button and replace it with my own. I COULD reinstate the bug where it has the submit button be unavailable and supply my own, but then I a) have two buttons, one of which is unusable and looks like an unprofessional mistake and b) I don’t know if it will activate the wipe.

Ask for Help form actions workflows api #clearvalues

Don’t confuse a Form or Form Container as being the same as a Custom Form. Forms and Form Containers are native Glide forms that hold data in a temporary state until the form is submitted. They are not connected to a table row. A Custom Form on the other hand is a made up concept which is just a normal detail screen attached to an actual row in your table. Entering values in a custom form actually update columns in an existing table row in real time.

The entry components on a custom form, as well as “This Item”, both refer to whichever row your screen happens to be attached to at that time.

First of all, I highly recommend creating a separate single row helper table that acts as the placeholder for your custom form entry values. The custom form (detail screen) itself should be attached to this helper table. The Submit button will take all of those values and write them to your destination table using the Add Row action. The Set Column action will clear the values in that helper table as long as you are referring to This Item, which is the helper table row.

Second, be sure your columns in the helper table are user specific. Otherwise multiple users will be stepping over each other when trying to fill out the form at the same time. This should just be a glide table as all of your user specific columns will not be visible in your external spreadsheet (and you don’t need them to be for it’s purpose).

I suspect you are currently trying to use the same table for your custom form as well as the destination for the Add Row action. This is a great way to unintentionally lose data due to people overwriting an existing row, or your set column action clearing existing data in the row the custom form screen is attached to. That’s probably why you are having unexpected results. You are adding a row as expected to the end of the table, but then promptly deleting all data from the first row that your custom form was attached to. Also, I assume you are not using a separate set of user specific columns and instead trying to dual purpose the existing basic columns in the first row for both your form entry and add row. That will definitely cause issues as your first row should have existing data from a previous form submission and you definitely don’t want to overwrite it for a second form submission.

That’s why I suggest adding a separate single row table with user specific columns just for the purpose of holding values from your custom form. It will eliminate all of your issues.

3 Likes

Also, part of your confusion is probably because you are using an external database. When using google sheets for example, all empty rows are ignored, so when you clear the first populated row, Glide will then ignore it and make the next row the first row, so your form keeps attaching to whichever it thinks is the first row in the table, which is the first populated row, all the while you are unintentionally deleting previous submitted data in the assumed first row to create a new row. If you happened to have a column you didn’t clear, such as a RowID column, then this wouldn’t happen since Glide would still see the RowID as populated in that otherwise empty row. However, I would still go the helper table route.

3 Likes

I think i see! I have some followup questions. I may wind up with more as i continue researching, but here’s these for now.

I suspect you are currently trying to use the same table for your custom form as well as the destination for the Add Row action.
Yes that is what I was doing.

  1. I probably incorrectly assumed that labeling a column as user-specific meant that value must be unique ala a unique ID, meaning that if a user filled out a form and selected option A, it would then not let a second user fill out the same form and also select A since A was user-specific. In the context of filling out a request form, how do I decide which fields are user-specific? And if the helper table is a single row, how does it handle multiple users trying to fill out simultaneously, since I can’t imagine how I would create one helper table per user. If there is a help article that explains this that I’m missing, my apologies.

  2. To restate what I understood from your explanation, entering values in the fields of a custom form writes in live time because the “custom” form is a detail screen looking at an extant table row (in the helper table). The fields show blank before user entry because that row has empty values. Because of that, I should be able to build something that allows me to open a detail screen for the helper table and then have a “add row” action within it to send it to the destination table. Is that correct?

  3. … but how…I know I previously added an action for a detail screen to a form i was building and later disabled it when I realized it was showing me previously submitted information, which makes sense per your explanation. However while I am trying right now, I’m not able to get a detail screen that pulls up anything besides user information. Previously I had made a collection of forms (from a table that is an index of forms), but then opening a detail screen for each listing backfired. It did let me have a form container that could write to my destination, but when I made changes to the that form container it changed it for all of the other form listings so I couldn’t really have unique forms.

You have the option to make (non-computed) column User Specific when they are created:

No, just a single helper table with a single row, for all users. That’s how User Specific columns work. They allow different users to store different values in the same cell. Each user only sees their own value.

They still need to be cleared. Best practice is to clear them as the form is being opened. If you take a look at my Custom Forms Concept App, you will see how this works.

Yes, correct.

With a use of a Button and Add Row action.

Again, take a look at the link I gave you above. Make a copy of the template and study it. Pay particular attention to how the form is opened.

3 Likes

Thank you! I should clarify, I’m asking what should my rationale be for determining which columns are user-specific - if I want each user to submit their own record should all of the non-calculated columns be user specific? Or is it only the user input columns.

I’m having trouble finding the hyperlink in your comment, I went to your profile but I’m not sure if i can find the Custom Forms Concept App in there.

With a Custom Form, almost all columns should be User Specific. Computed columns cannot be set as User Specific when you create them, but they will be implicitly if they refer to User Specific non-computed columns.

oh, sorry. I forgot to include the link. Here is it:

2 Likes

okay. New game plan.

The app is supposed to be a menu of request forms for users to fill out. To do this, I’m going to have a screen of collections. Each type of request form has its own collection ala “Things” (and therefore has its own destination table and helper table, because they need to have common fields). Each collection’s title bar action is a blatant rip-off of your “Add Thing” workflow.

For my implementation, in my ‘menu’ screen I will apply a filter for each collection so either A) it only displays records that were created by a member on the user’s team or B) doesn’t display any records, and just looks like a list of headers with add buttons. In case B, I would add a second screen of collections that has no title bar action but does display records created by a member on a user’s team and call that screen “My Team’s Items” or something.

I’m going to try this, both of you @Jeff_Hager and @Darren_Murphy have been very helpful and I really appreciate it! Particularly your level of detail and promptness have been invaluable.

2 Likes