Hey guys! 
Pretty soon, I’ll be launching a new video and app template for all of you to create an amazing onboarding expererience in your app!
Wait for it!
In the meantime, check out the latest version below.
After many, many requests for me in my first onboarging flow to make this video, here it is how to do create an Onboarding screen Flow! 
Video Link: Onboarding screens Flow · Glide | Loom
 Don’t forget to:
- Filter the tab/screen when Email is signed-in user;
- To turn into screens, use Link to screen action always This item, to keep always in the same row.
- Set a column to complete the onboarding
- Set the tabs visility based on this column when the user complete the onboarding.
thank you :):):) thank you for take time and thank you for the video
Thank you. Will reference this in a lot of threads going forward.
You’re welcome! Hope it can help you!
Thanks a lot @Lucas_Pires!
Question: do you really need the “Timestamp” for the onboarding complete, or is it ok to set column with TRUE, 1 etc ?
(just because I have several dependant columns on it …)
Thanks again
You’re welcome @AyS_0908!
As I said in the video, I comment we can use whatever column you want. Before I was used to add an boolean column and just set true, but for me now I prefer like this. This is not a requirement, you can do the way you prefer 
Hi Lucas, I tried to implement your onboarding screens method, but I faced several issues so I used another way of creating an onboarding journey for new app users. I’ll explain here why and how.
Issues
- I already used the detail screen to show user’s information (when clicking on a user relation) in other parts of my app and implementing your solution allowed only one detail view for a user row item
- the behavior when clicking several times on the default ‘return’ is weird, for example if I go the step 3 of my onboarding journey, then I click 2 times on ‘return’ to return to the step 1, when I click on the ‘next’ button, it shows me the step 3 instead of the step 2
Solution
I used only 1 level of detail screen with all the components for my onboarding journey, and I created an ‘onboarding step’ variable along with conditions on the visibility of these components to show the components corresponding to the current step.
How to implement it?
-
Create a new tab linked to the Users table and shown only when the column ‘onboarding completed’ is empty

-
Create all the components for the onboarding journey (progress bar, custom ‘return’ buttons, texts and inputs, ‘next’ and ‘finish’ buttons)

-
Configure the visibility of the components to correspond with the onboarding step when they should be displayed


-
Configure the actions to set the value of the column ‘on-boarding step’ for the ‘return’ and ‘next’ buttons (value from ‘empty’ to 1, 2, 3, 4 and so on)
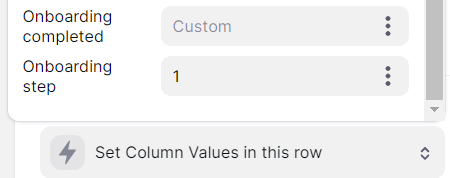
-
Configure the custom action for the ‘finish’ button (set value of onboarding completed to the current date & time, clear the value of onboarding step, and go to another tab of your app as the current tab will disappear)


-
Finally, check the behavior of the whole onboarding journey (this is mine for example)
Pros
- No conflicts with other detail screens with user info elsewhere in the app
- No weird behavior with the in-app return button because you use your own return buttons
- Progress bar and onboarding step variable that make it clear at which step of your onboarding journey you are
Cons
- It may look messy to have all the components in the same details view for the app builder
- You may forget some visibility conditions or values to set with the buttons, so it’s important to check all the screens and buttons
This method would be a LOT cleaner if Glide gives us containers in Glide Apps. @david 
Hey Guillaume! Great done! I use for some specific cases this type too
Just a notice, you’re trying to set a number value to what seems like a text column in your “Onboarding step” column. If you ever try to change that to “number” I fear the whole thing would break.
I would advise using a number column from the start alongside increment actions.
Thanks, I changed it to a number column, it’s better even if it worked well also with text (because I use ‘set to’ value instead of ‘increase’ or ‘decrease’ number)
Yeah, if I recall right, if you set a custom value to a column it will be read as text. Great write up!
Until glide gives us containers for apps, another way to organize the “messy” components would be to name your components in the data panel on the left-hand side. I recommend putting a prefix (onboarding step or the title of the step).
eg. 1_backButton
Just an update for better UI design, I discovered (after sharing with you this small onboarding journey) the very useful ‘button bar’ component, which is better to display the ‘go back’ and ‘next’ buttons in the same line as shown bellow :
And as @Robert_Petitto said bellow, it may be better to rename the components with the corresponding step when they should be visible 
Hey guys!
Pretty soon, I’ll be launching a new video and app template for all of you to create an amazing onboarding expererience in your app!
Wait for it!


