Hi all, I’ve been trying to figure out a way to allow a user to use a checklist to associate several items to a category (see mockup below). I know how to do this manually by entering text in a Split Text Column, but I want an easy way for users to be able to do this in the app with a few taps.
If designing a database to cater for this you would have 3 tables:
A Buckets table: a list of all buckets
An Items table: a list of all items
A BucketsToItems table: a list of buckets to items associations
I’m not a Glide expert by any stretch of the imagination, but this is probably the (possibly naive?) approach I would take. The way that translates is that when you’re associating an Item to a Bucket, what you are doing is adding a row to the BucketsToItems table.
Getting back to your question about using checkboxes, I think you may struggle there because there is no way to dynamically add/remove checkbox components. So unless the number of items is fixed, I don’t think that will be possible.
But you could “fake” it by using an inline list and style it to look like checkboxes. Tapping an item in the list would fire an action to add a row with the correct values. I’m pretty sure that would work, I’ll see if I can make an example.
So I was able to achieve the Items belonging to multiple Buckets with this technique! However, I had to use choice list to select the item, and I could only add one item at a time.
I don’t know how to remove the item(s) from the buckets
I don’t know how to make sure only the items not yet added to the bucket are shown as options for what can be added. (Which means I could have many duplicate entries to the ItemsToBuckets sheet)
How do you keep track of the categories an item belongs to? Did you create a separate sheet like the solution described above? Or is there a different way?
So I was able to do the same technique adding one item at a time to the category (Demo App, Google Sheet ). Does the google sheet look accurate?
I ran into the problem you just mentioned though-- how to only show the items left to add. Were you able to achieve this in Glide? Also, do you have a method for removing items from a category?
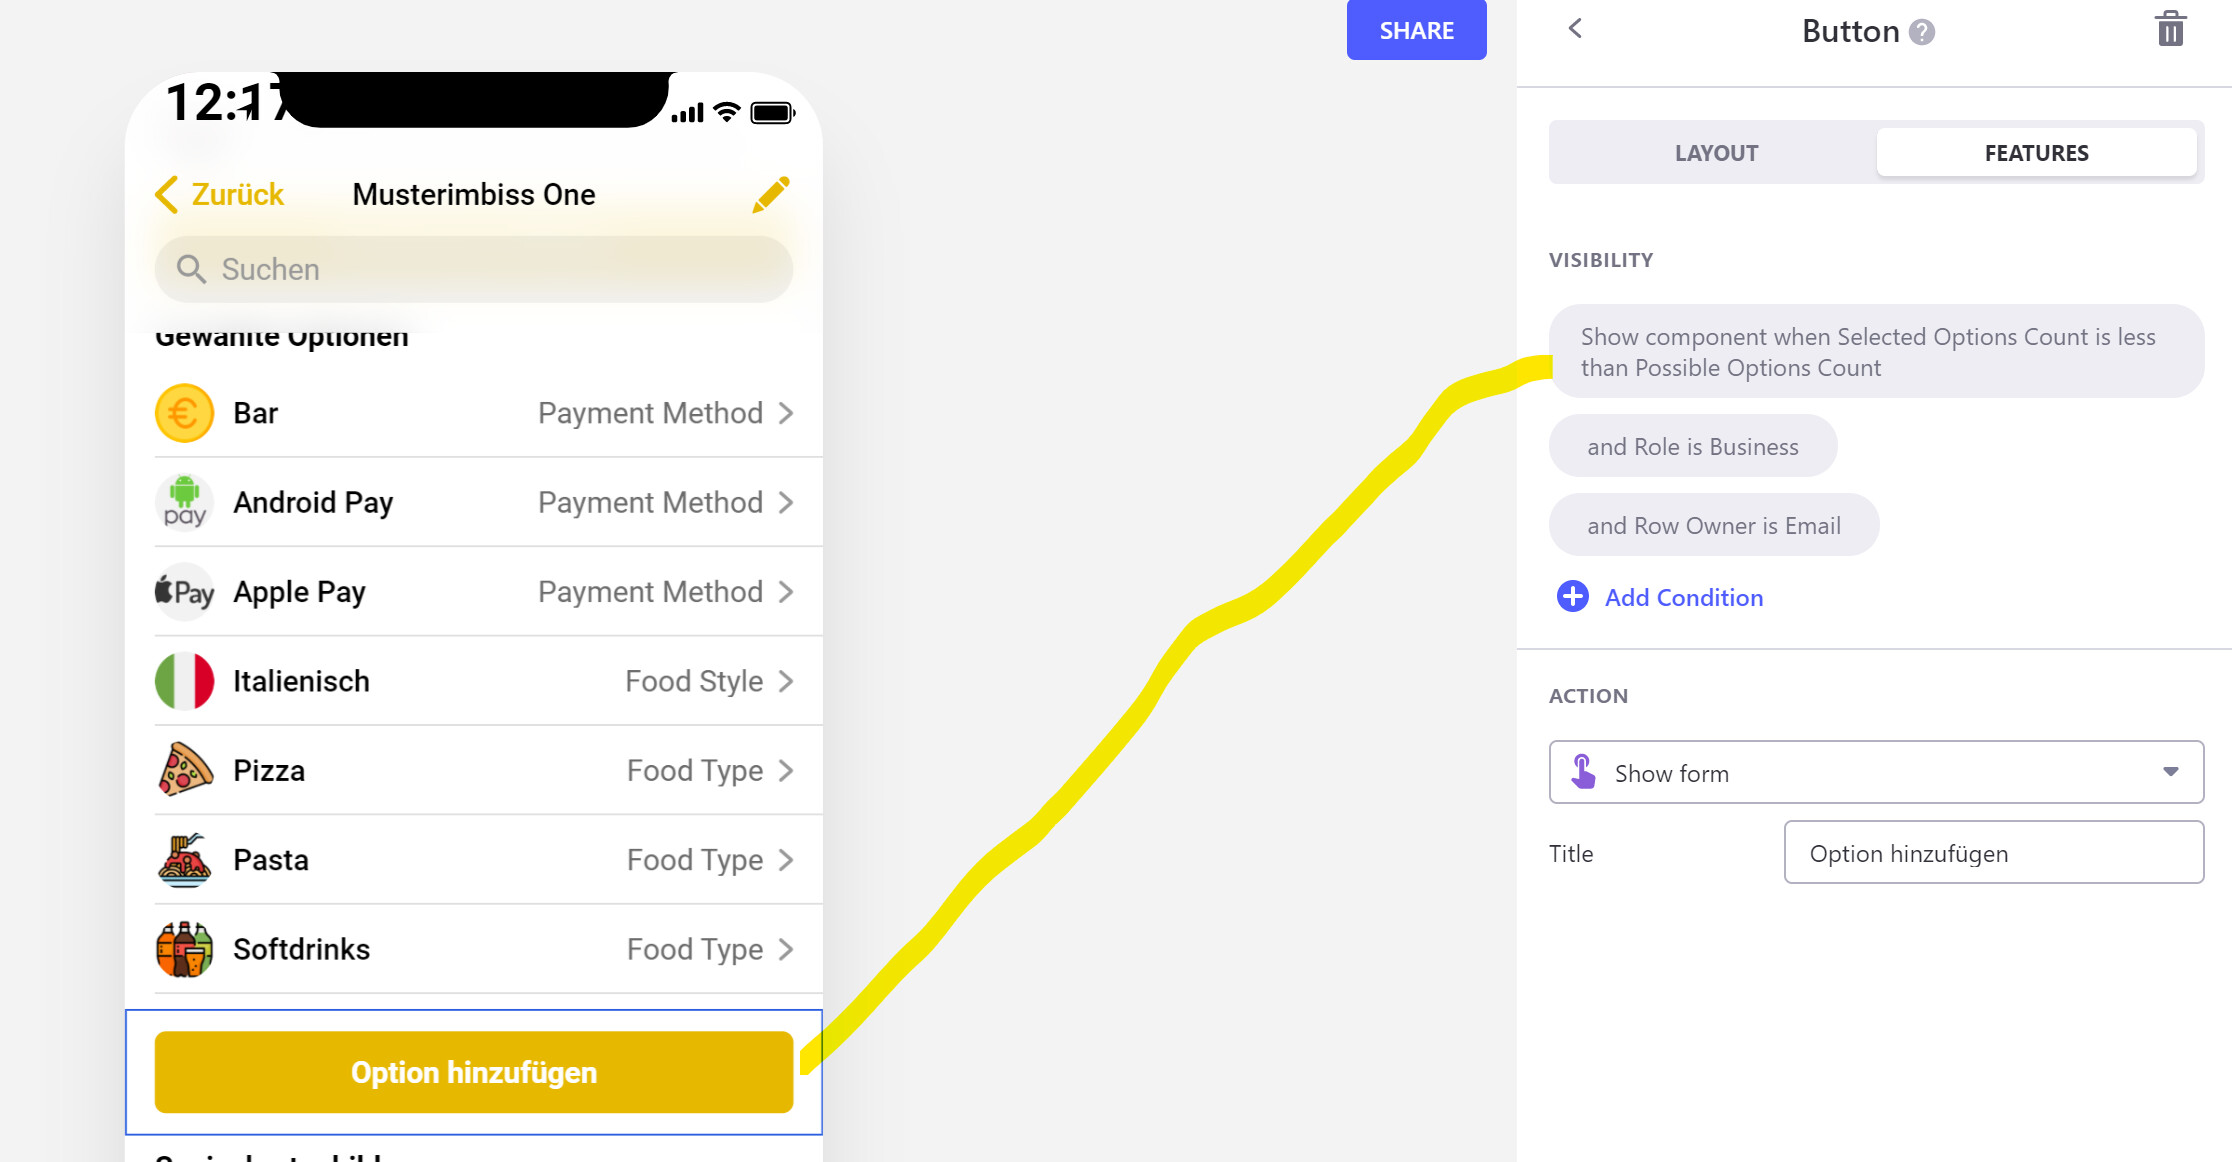
Selected Options is a rollup to the Options I already have selected.
Possible Options is a rollup to the Options, so I can make the add new option button invisible when no more options are left.
In the Option Sheet I have this relations to check wich Option is used in wich sale point. The Joined related Sale Point column is important for the choice component filter.