I implemented a feature that allows you to edit values across an entire column, similar to the solution discussed here, but using the official Glide API in a compliant manner.
For this example, I configured a choice component that enables you to select the rows you wish to edit. There’s a button that allows you to select all rows or clear your selections. This flexibility lets you choose whichever rows you need to update. Once you’ve made your selections, you can set a new value for a specific column and click “Apply.” This action will invoke the Glide API using a custom action to call the API.
Please use this feature with caution: each time you use the Call API Action, it triggers an update. Since the Glide API also consumes one update per mutation, be mindful of this when applying changes to multiple rows.
Here’s a brief demo

Implementation Details
In the data layout, there are two tables used to manage bulk edits:
- Registrations Table: This table holds the actual items displayed in the collection.
- Helper Table for Bulk Edit: This table serves as a helper for bulk editing operations. It contains additional computed columns to support various edit functions beyond the basic columns.
Data Table Structure
| Name | Description |
|---|---|
| RowIDs to Edit | This column holds the row IDs of selected items in the choice component, joined by commas (“,”). Set this column to user-specific to ensure unique values per user/session. |
| Count Selected | A rollup column that summarizes RowIDs to Edit by counting the items (set no decimals and no group separator). |
| New Value | Stores the new value to set. Make this column user-specific to keep values unique per user/session. |
| All Items | A query column pulling data from the Registrations table. |
| Count All | A rollup column that counts All Items > Row ID (set no decimals and no group separator). |
| Split RowIDs (Selected) | A split text column that divides the RowIDs to Edit values by comma (“,”). Glide may add an extra space by default; be sure to remove it. |
| Selected Items | A relation column that links each item in Split RowIDs (Selected) to Registrations > Row ID. Check “Match multiple” to enable multiple matches. |
| FrontEnd/All Items Row IDs Joined | A joined list column used by the front-end “Select All” button. It aggregates All Items > Row ID, separated by commas. |
| Selected RowIDs Array | An “Array to Set” column based on Split RowIDs (Selected). It outputs the selected IDs as a JSON array. |
| Mutations/Result After Call | Stores the API response value after the Call API action is triggered. |
| Mutations/Body Builder | A JavaScript column used for custom code. See code below. |
JavaScript
JavaScript Code for the Mutations/Body Builder column:
const rowIds = JSON.parse(p1); // Parse the selected row IDs array as JSON array.
const appID = "....................."; // replace .... by the app id
const newValue = p2 ?? null; // if the new value is empty, we want to set the column to an empty value.
const mutations = rowIds.map(rowID => ({
  kind: "set-columns-in-row",
  tableName: "native-table-.................", // Replace with the actual table ID
  columnValues: { .....: newValue }, // Replace with the actual column key to set
  rowID: rowID
}));

// Build the final JSON structure for the API call
const finalJSON = {
  appID: appID,
  mutations: mutations
};

// Return the JSON string, formatted with indentation for readability
return JSON.stringify(finalJSON, null, 2);
Instructions for Parameters
Set the p1 to Selected RowIDs Array.
Set the p2 to New Value.
Layout
Create a New Page
- Use the Helper Table as the data source.
- Choose the Custom style.
Add a Button with Actions
- Set up two actions for this button:
- Select All
- Clear selection
- Select All
Add a Choice Component
- Set Registrations as the data source.
- In the “Write to” field, select RowIDs to edit.
- Choose Row ID as the values and Name as the display text.
- Enable the “Allow selecting multiple” option.
Add an Input Field
- Add any input field (in this example, a simple text field).
- Set the column to New Value.
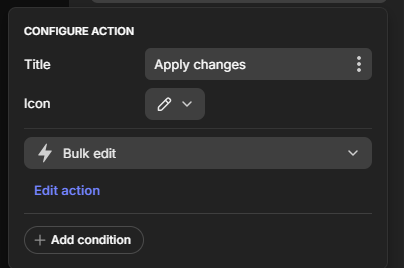
Add an “Apply Changes” Button
- Add a button to apply the changes.
- Map its action to a new custom action (to be created later).
Add a Collection
- Set Registrations as the data source for this collection.
Action
Open the Custom Action
- Open the custom action created in the previous section, and ensure the selected table is the Helper Table.
Add a “Set Column Values” Action
- Set Result After Call to Clear value.
Add a “Call API” Action
- Configure the endpoint as
https://api.glideapp.io/api/function/mutateTableswith the method set to POST. - Set the “Authorization” header to
Bearer ....., replacing.....with your secret API key. - Set the “Content-Type” header to
application/json. - Use the Body Builder column for the body.
- Map the response body to the Result After Call column.
Add a “Wait for Condition” Action
- Define a condition where Result After Call is not empty.
- Set a maximum wait time (e.g., 10 seconds) before it fails.
Add a Success Notification
- Add a success notification to confirm when the operation completes.
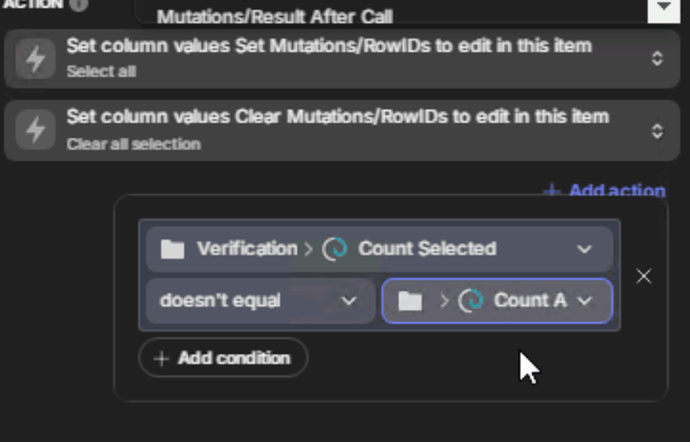
Your custom action should look like this:
If you have any questions, don’t hesitate to ask me!


